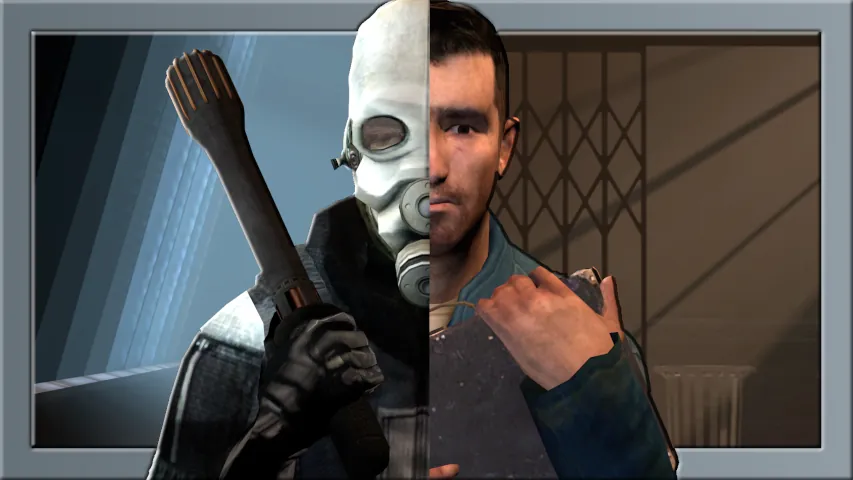
Learn how to port assets from Source Filmmaker to Source 2 Filmmaker. Following this guide you can repeat the same steps and port your favourite models onto the fresh software of S2FM.
But what does it offer that S1FM can’t? S2FM offers a Material Editor, Model Doc, a new Map Maker that’s just crazy, Particle Editor, Half Life Alyx assets (maps, models, materials), better lighting and more. The tools you’ll need are Crowbar, Blender, Blender Source Tools, Notepad++
If you’re unsure about S2FM or don’t know exactly how to get it up and running watch this entry tutorial to understand if S2FM is for YOU – https://inletzone.com/is-s2fm-for-me/
Get Half Life: Alyx from Steam – https://store.steampowered.com/app/546560/HalfLife_Alyx
You’ve got yourself a copy of Source 2 with Half Life: Alyx, and be it the Filmmaker or the mapping tools; whatever it is you wish to do… you have been faced with a problem.
Sure, you have all the assets of Half Life: Alyx and potentially anything you would have taken off the Half Life: Alyx workshop, but what about any other assets? What about assets from Source 1?
In this article we’ll be looking at how you can get these ported over with the Half Life: Alyx tools.
Just to mention, although you may have a GoldSrc model, it may already have been ported over to work in the Source 1 engine. So this isn’t going to be about converting from GoldSrc to Source 1. It’s going to be about converting from Source 1 to Source 2.
The first tool you’re going to need is Crowbar. This is used to decompile the models from their .mdl format into their decompiled format. All you need to do is specify an output location and specify the location of the model you’re decompiling. For example purposes let us say you want to port the Half Life 1, ‘barney.mdl’. We will examine how to setup the settings to how they need to be in this case.
Pretty much use the default, then press the decompile button… in a matter of moments everything should be decompiled into your folder that you have selected. Inside the folder you’ll find a QC, which is the file that tells the model how to behave, where the various bones are, collision boxes, the names of the various sequence animations which are included. Since Crowbar is also able to decompile them, you can use them later in the Source 2 engine.
With the model now decompiled by Crowbar and ready to use, the next step is within Blender, the 3D studio for modeling, animation and various other things.
The first thing you need to get for this to work is the Blender Source Tools. There’s a reference on the developer site for Valvesoftware. You simply install it, go to your preferences and find it under Addons. Searching… Source Tools, and ticking it on. This will then allow you to go into File, Import and ‘Source Engine .smd’.
You now give it the location you decompiled these assets to. Paste it as the location and select only the QC for this, and then import. If it has given you some errors don’t worry about them. Here you have the model, that’s the important part. If the model is huge, it is simply a byproduct of how big the Source games are, compared with how Blender handles sizes. You may also notice a boxy outline. This is the collision box. You don’t need it. If you want to delete it, just press X. You’ll also see there’s no textures. This is something that will be fixed in Source 2 since there’s no need to sort out applying the textures inside of Blender.
To check that the animations are present and are working and inside of the Action Editor of the Dope Sheet, select various animations. You will see some can work, that the animations are functional. That’s simply a matter of how the engine handles animations. The Source engine that is.
Movement should be kept within any animation with motion, such as a running animation. There’s no need to make changes to this. Now that you have checked the animations are functioning properly, it’s simply a matter of renaming these for your own tidiness and exporting them.
If you pull this down, they will disappear because they’re going inside of this thing.
You can select the folders, select X to remove them, and now rename the model to ‘Barney’, perhaps even ‘Barney-hl1’. Continue with other elements, such as, with Barney comes his gun, which can be renamed to ‘Barney gun’. Also ‘Barney gun holster’ and ‘Barney body’.
Next, go to the button Scene properties, and scroll down to find the Source Engine export options. Now you need to choose an export location. This can be wherever you want it, but I’ll recommend, at least for now, putting it in the same folder with the objects you previously decompiled with Crowbar. Paste this in as the location. Have it selected as DMX, Z axis as up. The DMX version should be 5.
If you have model 22, this is for the Source 2 engine.
Now you’ve got a selection of the things you’re going to be exporting and right now you want to keep all of these, although you can deselect the animation since animations don’t export as DMX. Instead they export as SMD. With this setup simply export – and the scene: export the 3 files.
And there you have them, exported as DMX. now in the correct file type to be opened in the Source 2 engine. Go to the Source 2 engine and see what happens. The first thing you’ll see when you open the Source 2 engine, is the Asset Browser. This is like the working hub of the engine. You have here the Filmmaker, the Material Editor, Hammer the mapping engine and the Model Doc.
Now click on the Model Doc, then click on Add, and Add Meshes. It will then prompt you for the meshes you wish to add. Feed it the DMX you created through Blender. You can select all of these and click Open.
Now, I suggested this deliberately, obviously, because I wanted to show you that you can open assets only inside the Content folder of Source 2.
You have Half Life Alyx inside your steamapps folder. Inside of that Content. Make sure it’s Content, not Game. Game folder contains the compiled versions of whatever it is you create in the Content folder. Go into Content, Addons and this will be whatever name you’ve named it to be.
Click on this, Models. If you don’t have them you can make them yourself, although usermod can be whatever. In here, however you’ve sorted your folder structure you go into wherever the assets need to be from. Here you have ‘Barney-hl1’.
You mustn’t have spaces or capital letters, only lower case values, numbers and underscores are allowed in this entire string; anything else will not work.
Go into the folder and re-paste in these assets ported out through Blender. Now try again to add them and see if it works.
Nothing happened, so now press compile, and now you have a wireframe, glowing error of the Barney model. Tracking all the way back to Source 1, you of course see this model has various textures. To find what these textures are from here, you can click on the specific model, right click.
Because you do not already have this, this will say Add Material Override.
Show in Element Viewer and Model, and in the Element Viewer, underneath materials, you get a list of every single material which is being referenced by this model. And yes there are quite a lot because, as I mentioned before, these have been ported from GoldSrc and haven’t been optimized.
So for this, it’s a fairly slow process compared to other models which are more optimized. There would be fewer, but you see the location of each material that is required. For example, the front mid, the chest part, you see the location inside the model: Barney, and it is called ‘bx-front-mid-1’. So let’s run away and find where this texture is to be found.
Even tho there is no folder called materials here, every single material will be inside a folder called materials. So materials, models, Barney and bx-front-mid-1, and this leads to a VMT.
Now, maybe you don’t already have this aligned to be opened by a specific piece of software, but I have fixed it so that it is automatically opened by Notepad++. The details of this material can be seen, and importantly that the texture itself is located: the same models, the same Barney, the same ‘vx-front-mid-1’. So it’s in the same place. I’m only really pointing this out to you for completeness because you can see quite clearly that it’s right here.
By clicking on this material it will be opened inside VTFEdit, which you’ll have to go find and install. From here, go to File and Export, but don’t actually do this, because instead of exporting each of these like a monkey, you’re simply going to reopen VTFEdit, go to Tools and Convert Folder. Be it this location as the input.
You see this awful piece of… And assign it an output location. Here you’ll just create materials in the same place with the DMX from Blender. Insert the output folder to be here with DMX that was exported through Blender. Set this to export as a PNG. You can have a JPG if you want, but PNG has higher quality, and convert. It’s going to take a few moments, and all of them will appear as PNGs, nicely converted and ready to be used.
Now the next step in the operation is to reopen the Material Editor, and for every single one of these, sadly so. You’re going to create a new texture, save it as something Barney-hl1, materials. Call this ‘chest-front’ and save. Saving will allow you to edit this texture.
The first thing you’re going to need is the color, also known as the diffuse; the texture itself. Click on the folder, specify its location. Go to all images, because by default it’s looking for something with a suffix with the ‘_color’. If you want you can add this, but it’s not necessary. Go to all images and select the front chest. It will update in a moment and show you what you’d like to see.
If you want to change other things, you can. You can add roughness, metallic materials; whatever you’d need. You can also play with these settings which allow you to do various things like self-illumination for lights. Specular for metallic textures. Transparency and translucency for objects with transparency in them.
Now by default the shader setup type will be VR simple, but personally I’d recommend clicking on Shaders, clicking on VR complex and setting it as the default. This just gives you more options to play around with. With this created, go back to save it. You can see the little star disappears.
Go back to the Model Doc. Now to add the materials: click add and ‘Default material group’. Clicking here you will get the lists of all the necessary textures this model is looking for. Go find the ‘front mid’ here and click search, and then look for ‘front chest’. And there you have it. The first step of texturing this ported model is completed. Now all you have to do is do this for however many materials your object specifically has.
So we’re finished, the tutorial is over. Everything is completed, the materials have been applied and everything is good to go to be used however you wish to use it.
But what’s this? Why does he have two hands? two guns? What about his mouth moving? What about the animations? I guess we’re not done yet.
First, see if we can sort out an alternative set of textures. I’ve specified before that you should put a default material group when searching for this particular field. Now you’re going to search for a simple material group and choose it. You’re going to give this a new name, whatever name it is you’d choose yourself, but for this part we’re going to name it Injured.
And now what would this do if you compile it? What this would do is, well, you have here the default materials, but here you have a material group, and the materials will remain the same, unless there’s a new material specified in the material group. What this essentially means is that for any instance of a material that is changed for another, they will be changed, but any material left unchanged will not be changed and will use whatever is set by the default material.
You will see that these are now changed to the injured variety, while under material groups,you have default and injured. Now you can quickly switch between multiple textures by clicking on whichever you desire.
Next-up is the animations. These haven’t yet been exported from Blender. To see if you can make these work with this model, go back into the folder inside of the Half Life Alyx Content folder, as was mentioned earlier. Create a new folder for animations. Call it whatever you want it to be.
Now run along back into Blender and choose the first animation. Let’s say idle. ‘Barney idle’.
Now go back to SMD under the Source Engine export options. Select SMD, untick these models here, which don’t work being exported as an SMD. Tick the animation. You know it’s an animation because of its identifying symbol. Now simply export the selected file.
Perhaps you want more animations, so now export animation 3, where he messes with his trousers or whatever. Automatically that will change here from idle 1 to idle 3. Just hit export again. Now let’s say you want him to draw his weapon. Export this. Lastly, because no need to do everything right now, grab the animation of Barney walking.
With these all exported out, go back to the location they’ve been exported to, grab the animations and put them in the Half Life Alyx Content folder that you created just a moment ago. Now with this location copied, go back to the Model Doc and add animations from here.
Make sure you’ve exported them as SMD, then feed this the location and select the 4 animations you have just exported. Now it’s smart, so it recognizes idle and walk. It recognizes that walking might be something you’d want looped, which you do.
So you have the animations. Recompiled. Go to animations controls and press Play. You can see the draw animation which was given no looping tag is playing and looping. The idle animation, the other idle animation and the walking animation. You see it’s done the job for you, but I was going to show you how to do this.
So delete the little addition it has made. It is sometimes possible that it walks forwards but at the end of the walking animation, it goes back to its starting position. which you don’t want to happen. Extract the motion from the root motion and use that to drive the location of the object. If that’s too technical don’t worry, as you’ll soon understand what I’m blabbering about.
Select on the walk animation that has been created, right click and out of everything here, we need to add Extract Motion. Now recompile. Automatically it’s understood that the root bone is the root bone. Specify here. There’s no need to do that now, as it already works.
The grid beneath his feet is now moving, meaning that he’s moving through the world, rather than looping back at the end of the animation. This is important, because if you jump back to SFM, you will soon see what I mean. You can add the Barney model.
Go to import, sequence, walk and without having to setup anything, he’ll walk through space. That’s the advantage of using this ability to extract the root motion of the animation. Now you have the animations imported, and with a bit more work you could have all of them functioning properly.
Move on to the next step and see if you can get his mouth to move. The process of creating morphs or facial flexes requires you to run back to Blender. It’s not that scary. You will see it already has a bone for controlling the mouth, but that’s not relevant right now.
In creating a facial flex or morph, it will not only adjust the face but change any part of the model of any model that has vertices. First in Blender you want to select your model and then with the tab on the top left, set it to Edit mode, or you can use the Tab key. Then you’d want to go down to the tab, object data properties. You’ll see a tab called shape keys.
The first thing you’ll do is to press the plus button to add a basis. This is your default, the thing the model will have initially. Here you can create another one, double click it and give it a new name, in this case mouth. This itself is now the actual shape key which will be used in whatever software you’d use it, in this case Source 2. Inside of Edit Mode: being sure that the new mouthpiece shape key is selected, you’re going to go to whichever part of the model you want to, in this case the mouth, and at the top-left you can select vertices, edges or faces.
With the vertices selected you can move the points. With the face selected, which you’re using in this case, select a part of the chin and move it down slightly. Now what the shape key will do is it’ll take the 1st location of the basis and the new location of the shape key, and depending on how much the shape key is set to, between 1 and 0, it will morph the model, hence its name as a morph, from the initial base position to the new mouth position.
The same goes for whatever model you were to be changing and whatever elements were to be edited. This is not restricted only to face expressions or opening mouths. Although teeth are a separate thing from the mouth, it’s its own thing. Bring this down to follow the path of the mouth as it opens. And even if it’s not jointed exactly, it will follow along when you change these morphs in Source 2.
You can press W, E and R to go between moving, rotating and scaling. Here just scale the mouth slightly to fit its new location. Pressing Tab again or selecting Object Mode from the top left tab, you will see that with the mouth key, sliding the value from 0 to 1 opens and closes the mouth, just as we had hoped for.
This preview you see here will be the same, as the model will behave when it’s ported back into Source 2.
Go back to the DMX export, specifically the body. Select it, since that’s what contains the head. You can re-export to the export path previously set and overwrite the initial models that were ported into Source 2.
Going back into Source 2 with the model exported, you should see it’s asking to be compiled. Pressing this updates the model, and underneath the Morph Explorer you can see the new morph created, in this case mouth. Changing this slider does not actually affect the model. Now why is that you might ask? Well, the reason is actually because the material has to be set to accept morphing.
Even if the morph changes the model it’s the material which receives the changes in a sense.
Under animation there’s a blank tickbox called ‘morph supported’. Now this is the vest. It isn’t what is accepting the morphs. So now to find the textures for the face: in the Material Browser, or simply go to the default material groups, scroll down and find it, double clicking it to automatically open it inside the Material Editor, then simply select whichever other body parts are morphed and tick ‘morph supported’.
These then just have to be saved and they should update automatically in the Model Doc. You see now they work. But what’s this? You can see that the inside of the mouth is transparent. That’s because even if you set the face and the neck to have morph supports, you haven’t set the inside of the mouth or the teeth. Add these to the morph supported tickbox and you will find these in perfect working condition.
Now that you have facial flexes working, you can take a moment to make some yourself if you want, perhaps expressions, perhaps the motion of breathing in and out of the chest. But now that this is out of the way, let’s go back to one of our firstly noted issues of the duplicate guns.
The process of creating bodygroups: the last thing we’ll be looking at, is a little bit long-winded. What you’ll have to do is break down parts of the models into component pieces. Here, one of the issues you have is the gun in the holster and a gun in the hand, which means you have to separate them and turn them into their own things.
In Blender select the object, go into Edit Mode and you’ll see you have the hand there. This will be the 1st body group, the hand with the gun, while the hand without the gun will be the other. Hovering over the hand, press L because the hand is one enclosed model.
As you see the thumb here is its own specific part, so with both of these selected, right click, separate by selection. Now this hand is its own thing, but the hand will still be controlled by the skeleton, which means the various animations would still work. Call this ‘barney-hand’. So you have ‘barney-hand’ and ‘barney-gun’, and inside of the Valve Source Filmmaker you’ll be able to switch between these.
The other problem is having a holstered and unholstered gun. You simply need to separate the holster; separate by selection and now the holster is its own thing too.
Leaving Edit Mode, you can have ‘barney-unholstered’ for one and ‘barney-holstered’ for the other.
If you find there is a slight issue right now, that the gun holster and the hand appear to be attached, you can hide the gun since you don’t need it right now, and hide the unholstered holster. If they were one model, they’d both be moving in sync, rather than individual objects, but the issue here appears that a duplicate of the hand has found itself in the ‘gun-holster model’. So just hover over the hand and the thumb and delete them. Now you just need to put this back to the 0 position, then put it back to where it needs to be. Do the same for the hand, and now these should all be separate objects as they’re supposed to be. Rename them to give them some clarification as to what they are: ‘gun-holstered’ and ‘gun-unholstered’.
Going back to the Source Engine export options, you will see there are numbers, these show that there’s 1 shape key involved in this object. You can select the unholstered hand, the holstered, the empty and the armed parts of the model, and export these as we did before as DMX to this location. Let’s have a look at what’s being exported and what you need.
So you have unholstered, holstered, body, the gun. This gun you no longer need as it’s been superseded, so you can delete this. Now just open up the Source 2 engine, and with the Asset Browser opened up go back to the Model Doc from before and open Barney. Everything now seems to be in order but compiling is failing because the gun is missing, the gun which you have deleted.
You can simply delete this as it’s no longer needed. Now recompile the model and everything is as it should be, except there is no hand. So go back, add, and as you did at the very start add meshes, give the location to where you exported to and add the elements which have been newly created – apart from gun holsters since that already is a part of it.
After compiling there is the same issue as before: two guns, two hands… so you’re going to do a bodygroup, simply by pressing the Add button and Bodygroup. The Bodygroup choice doesn’t seem to make a difference in the SFM engine. The point of Bodygroup choice is that you have a list of choices which cancel each other out, so you can have only 1 at a time. In SFM at least that doesn’t seem to work.
I think if it was set to automatically choose itself, such as which head it would use for a citizen model in Half Life Alyx, I believe it’s for that, but for SFM it doesn’t work. So just use a normal bodygroup. Add it and call it Armed.
While you’re at it, create another bodygroup and call it Unarmed. Let’s be consistent with your naming. Compile. For the Armed selection add a bodygroup choice here. Compile again and add 2 meshes since this bodygroup is going to compromise of a hand and a holster.
You didn’t have to create both of these. This is for if you want them to affect something different, so you can delete the 2nd one. You can keep it named Armed tho. You’ll see it failed to rename because you’re trying to give it a name that’s being used, so call it Weapon Held. Select it, copy, paste and call this one Weapon Holstered.
Now you have these 5 unnamed choices. They’re unnamed because they haven’t been given names here. Call the body the Body. You don’t exactly need to name the body right now but do it anyway just for full clarification for what everything is.
That’s the meshes all properly named as to what they are, and if you go back you’ll see the names show what is in there. So ‘weapon held’, the gun in the hand. That means you need the empty holster and the gun with the hand.
And now recompiling it, you see the secondary gun disappears and you have only the one hand.
However, go into the bodygroup choices. You see body is here on its own. It automatically creates this one, because the body would always be visible. It brings up a warning that body is not in any group and that it’ll always be visible, but that doesn’t matter because it is what you want.
You have the choice to have the gun in the hand or the weapon holstered. Changing them will put the gun where it’s necessary to be. This process can be reused for any kind of bodygroups you’d need, such as changing the heads or putting other things on the model.
Now, with everything pretty much wrapped up and finalized, what you are left with is an imported model taken directly from Source 1 with the animations included, with motion being derived from the particular animations that require it. You have material groups for different states of the model.
You have bodygroups to show it at different states of the model as well, similar thing. One texture-based, another model-based and you have the capacity to change various colors: change the reflectivity of the helmet, the shininess of the armor…